
How it works
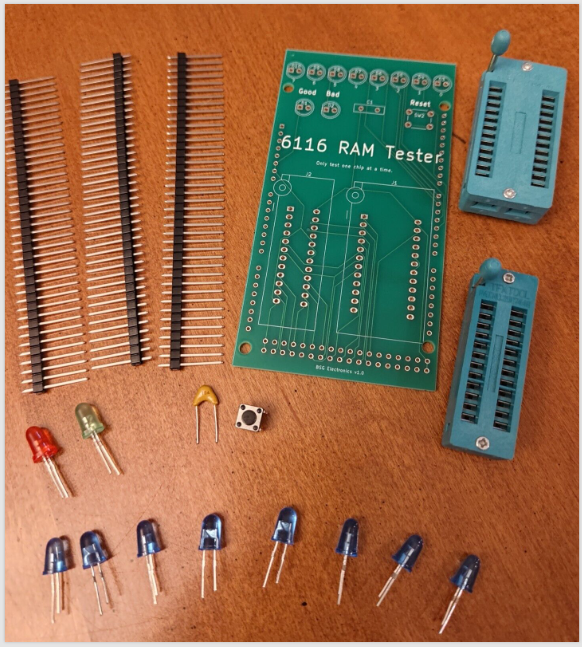
What's included
Assembly Instructions
1. Other parts you will need - an Arduino Mega, soldering supplies, wire cutters, and a PC with a USB port.
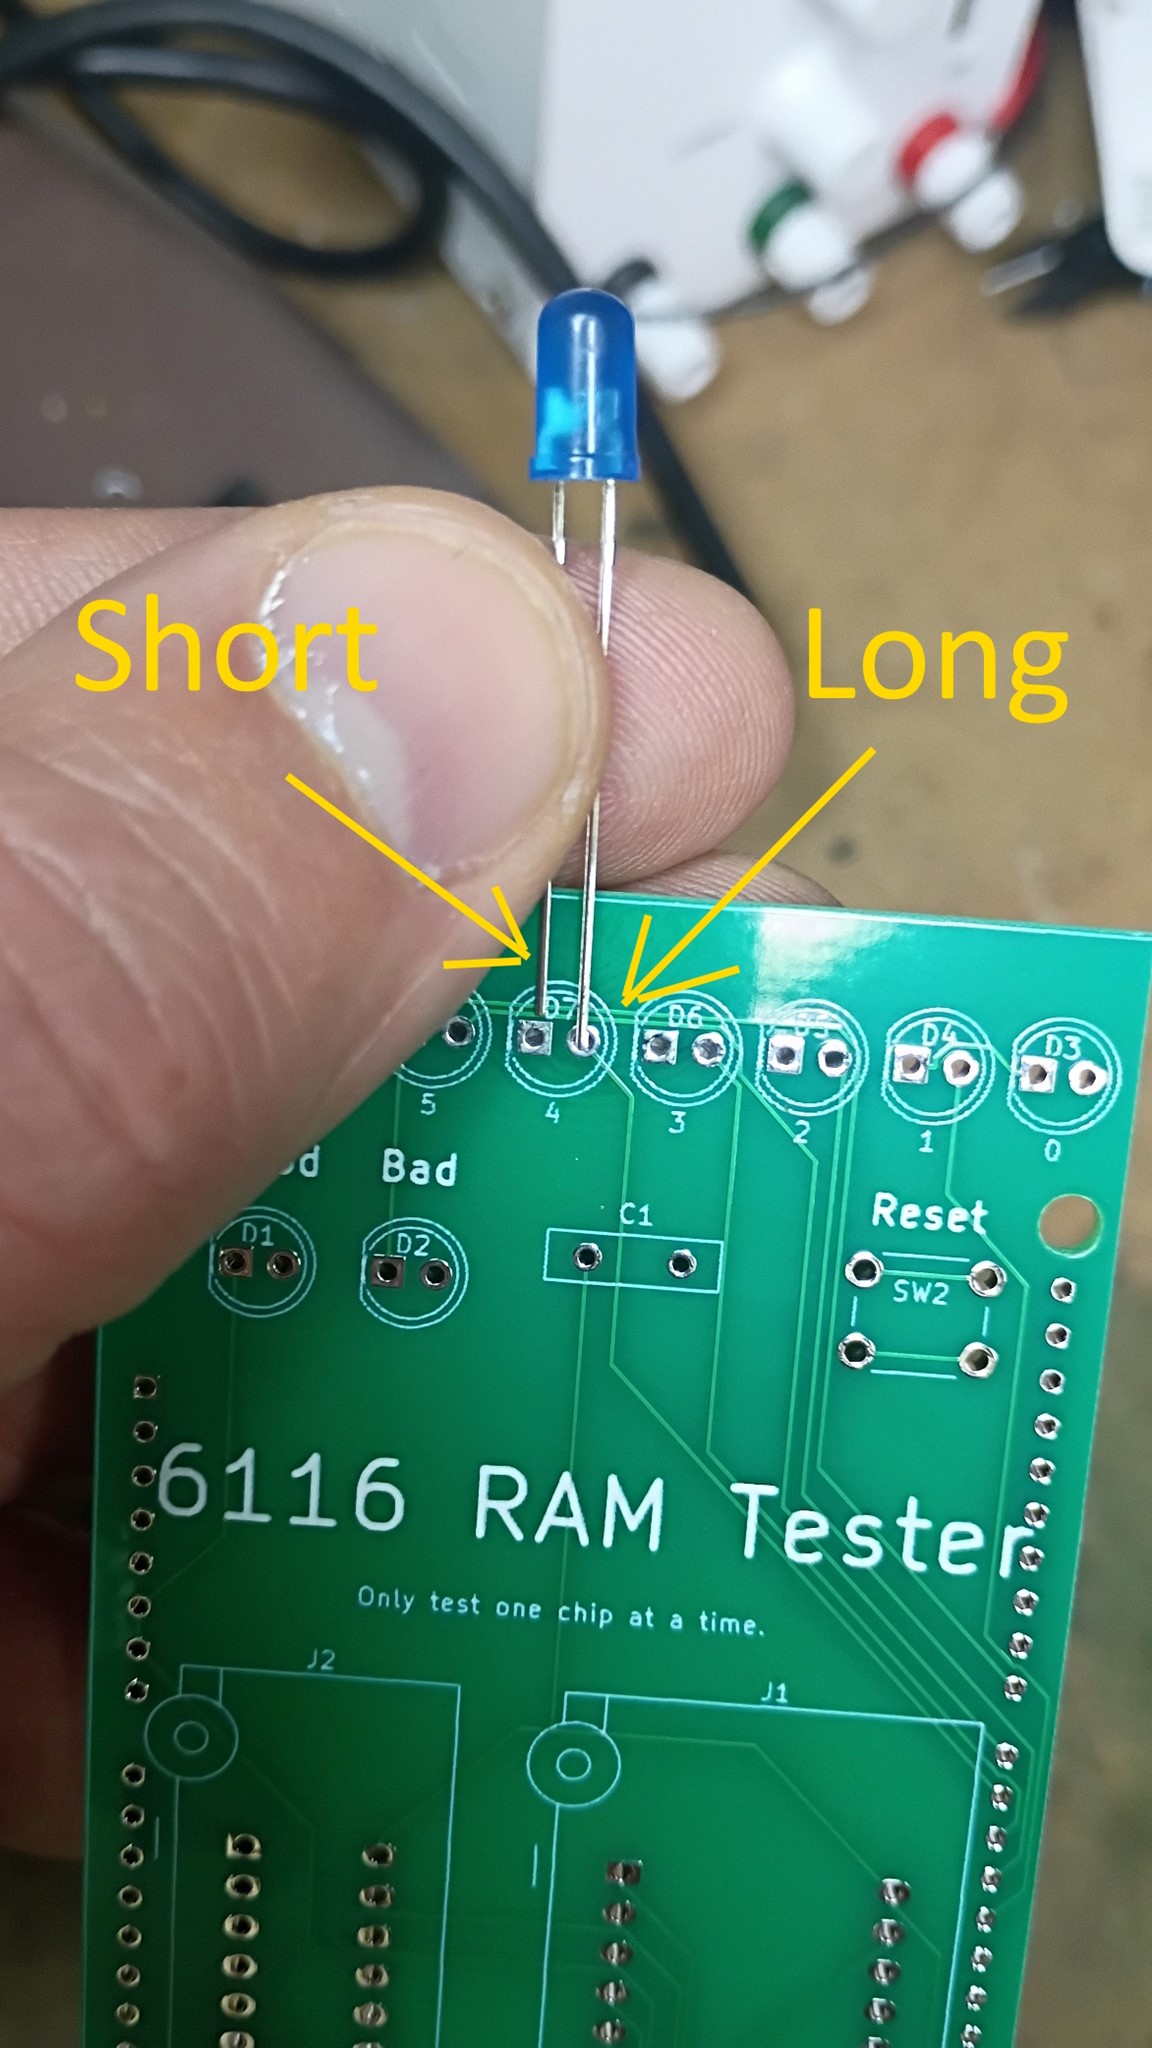
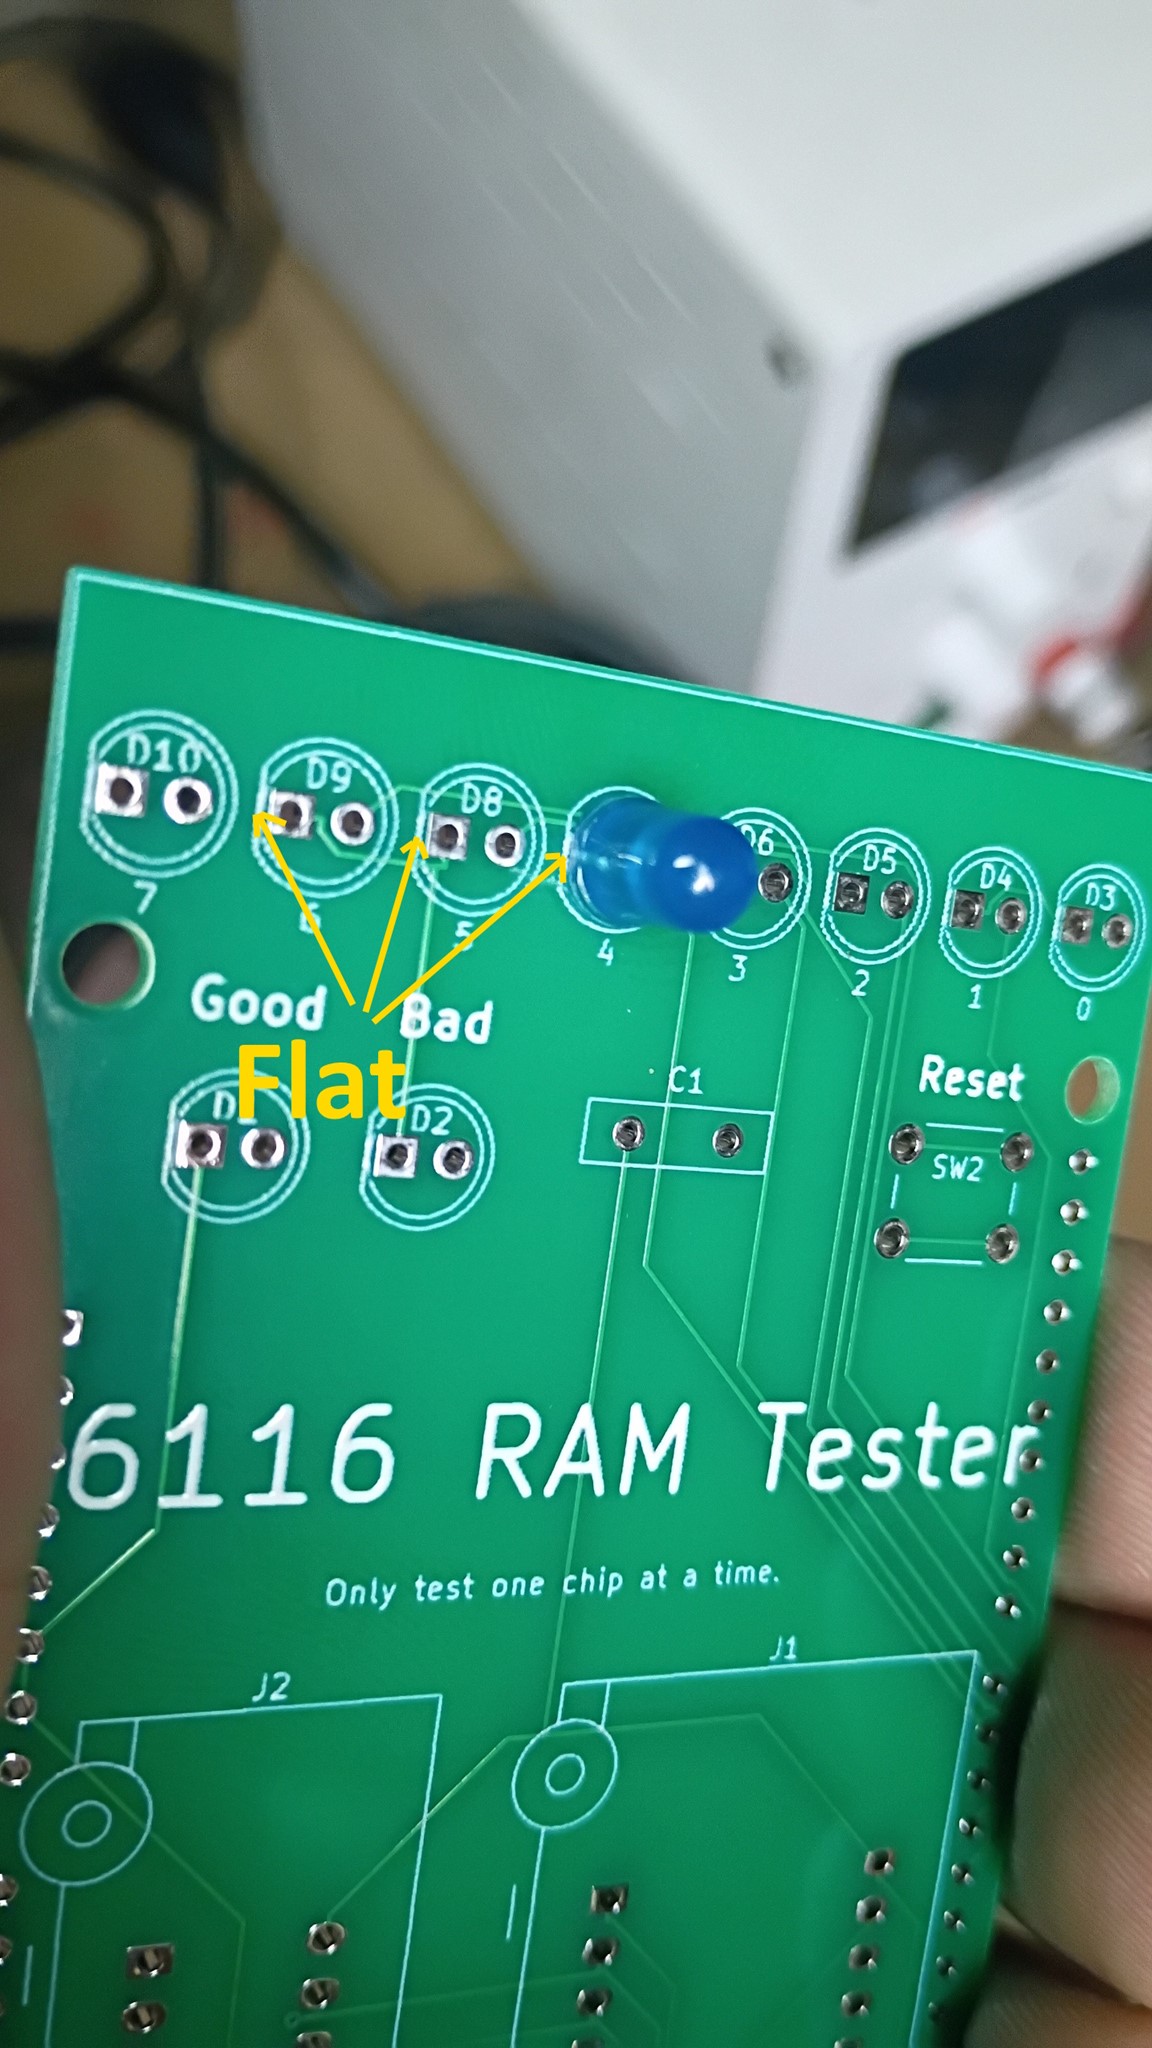
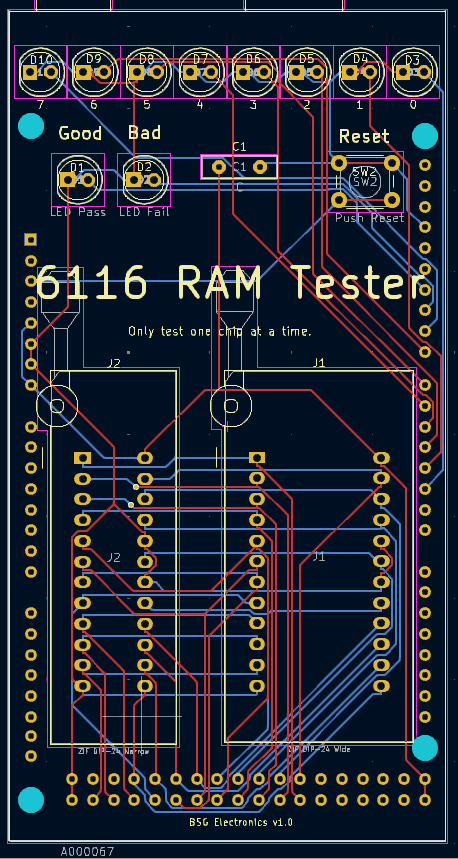
2. Assemble upper components. Insert LEDs, Switches, and the zif sockets. LEDs must be inserted in the correct orientation. The longer leg should be inserted in the hole on the opposite side of the flat mark on the board.
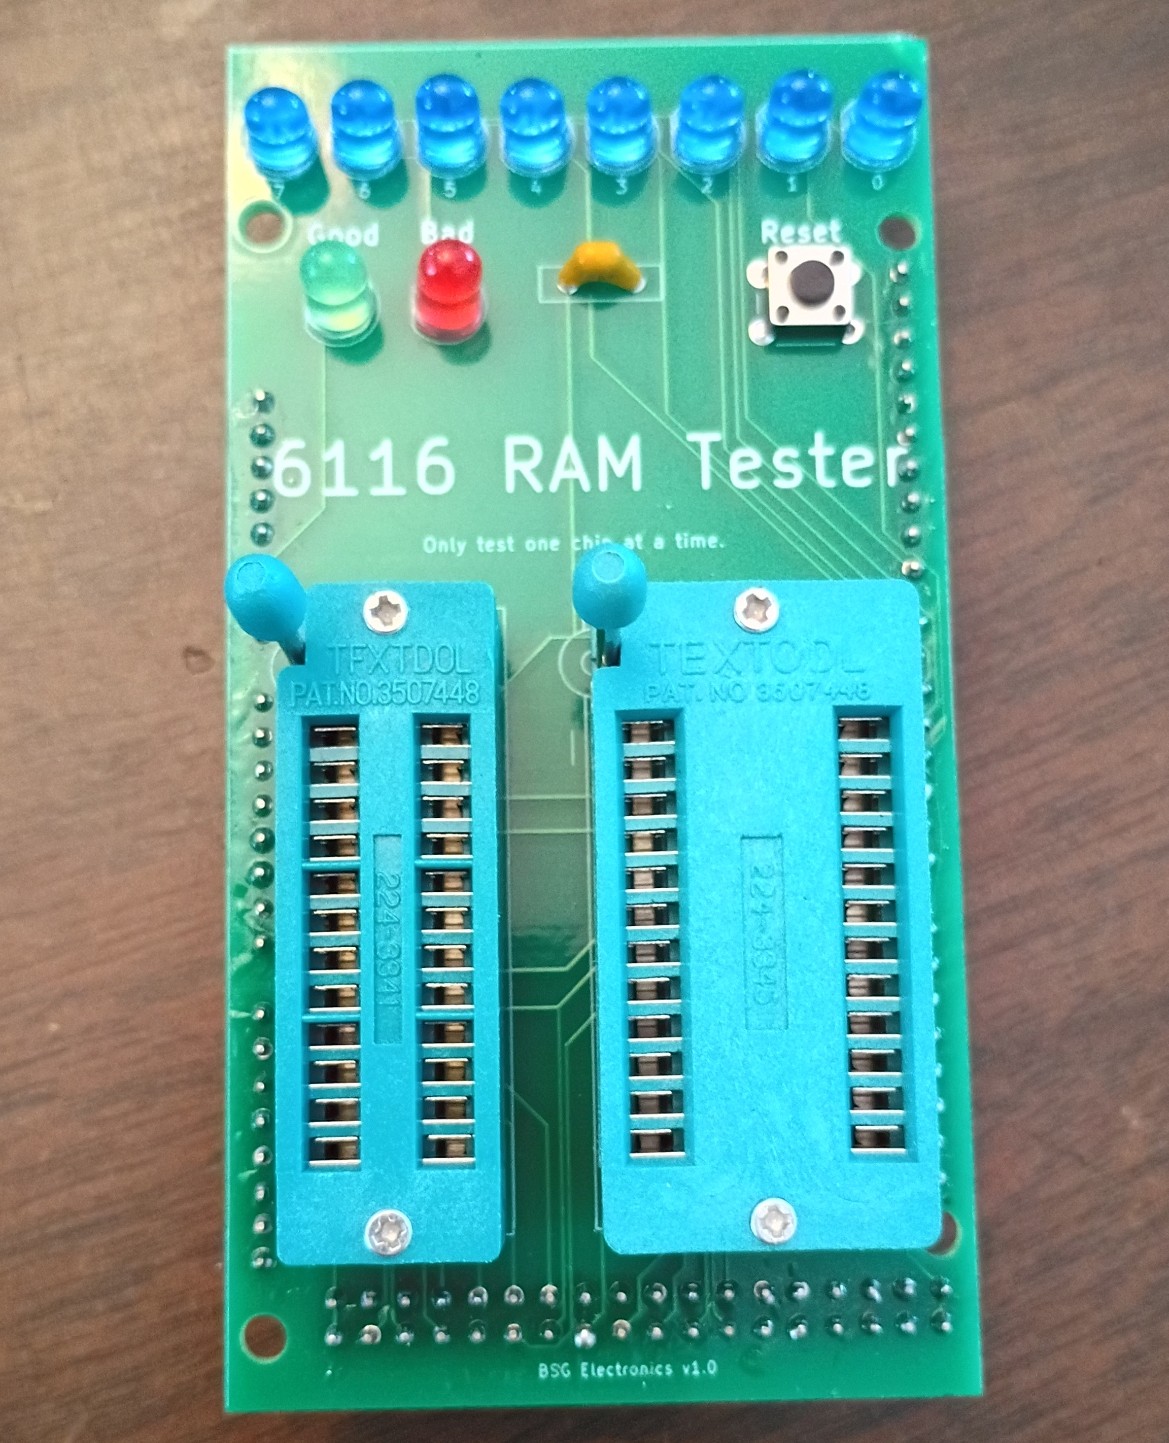
3. The board should look like this with the components inserted.
4. Flip the board over and solder in the components. Ensure that extra solder does not connect any pins. Trim the extra wire length off the led legs.
5. Now cut the pins to fit into the series of holes on the edges of the board. Extra pins can be saved or discarded.
6. Insert the pin sets as shown.
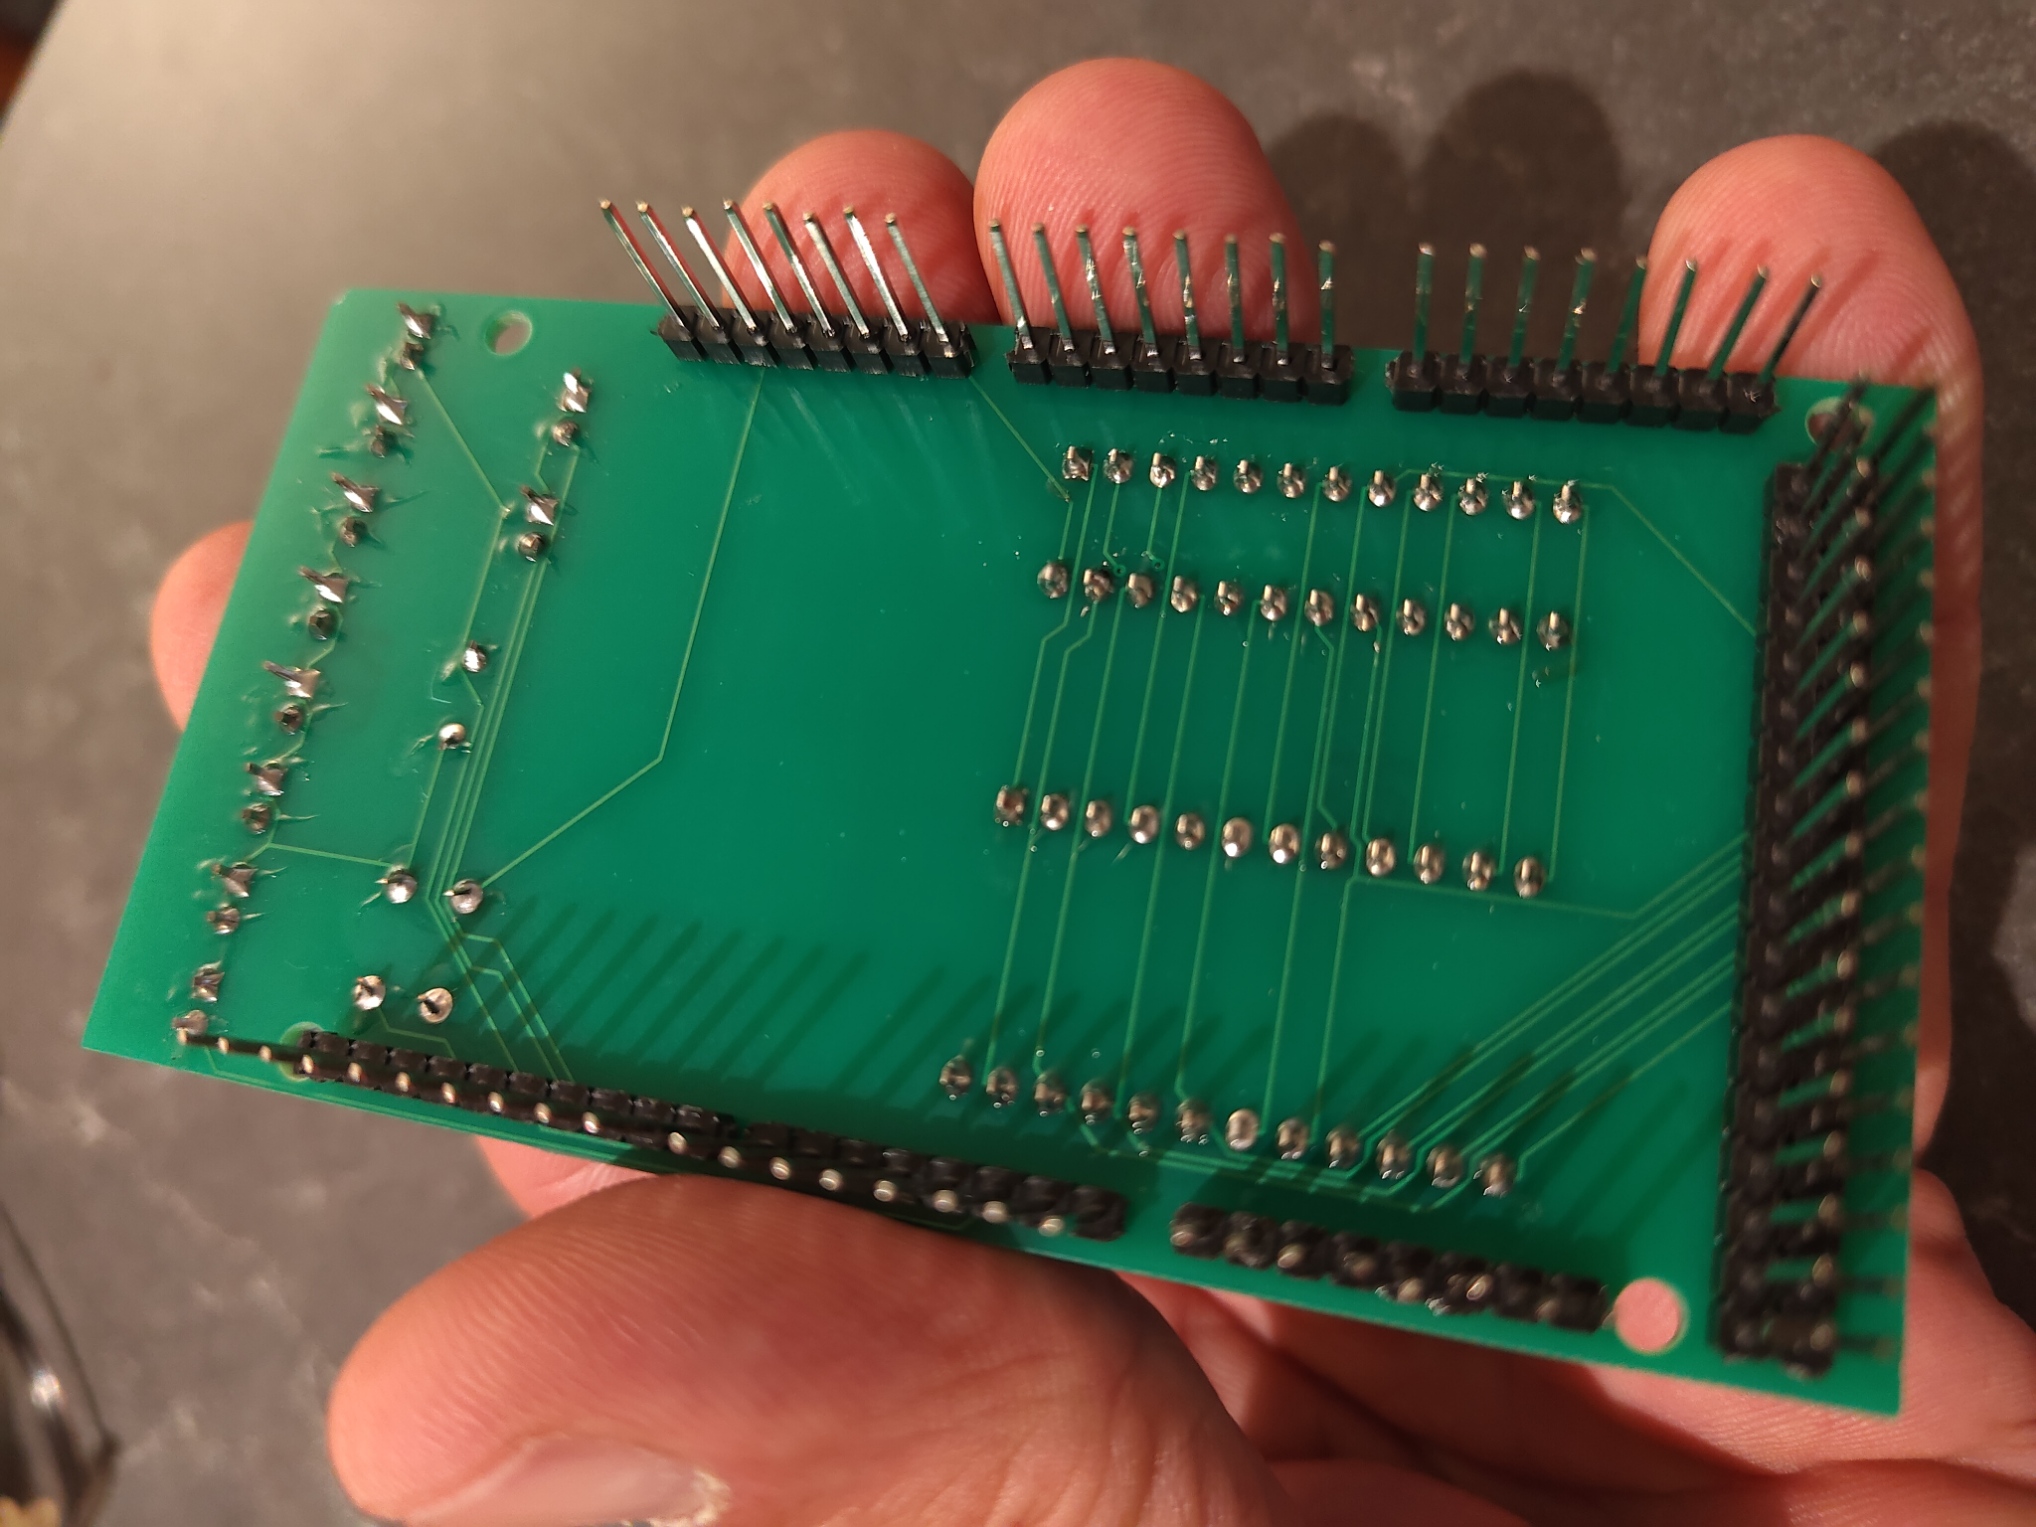
7. Solder pins from the top of the board and install the completed shield on your Arduino Mega
8. Download and install the Arduino IDE software from arduino.cc
https://www.arduino.cc/en/software
9. Download the 6116 memory test source code. Select "Code" > "Download Zip". Extract zip file and save 6116-sram-tester.ino
GitHub - cpyne2/6116-Memory-Tester: Arduino project for testing 6116 SRAM modules.
10. Connect your Arduino Mega to your computer via USB.
11. Launch the Arduino IDE software. Make sure "Arduino Mega" and your appropriate COM port are both selected under the Tools menu.
12. Select File > Open and then select the 6116-sram-tester.ino file that you downloaded previously.
13. Select "Sketch" > "Upload" to load the file to your Arduino. *Note - If you encounter an upload error, retry with the shield disconnected from your Arduino.
Using the 6116 Tester
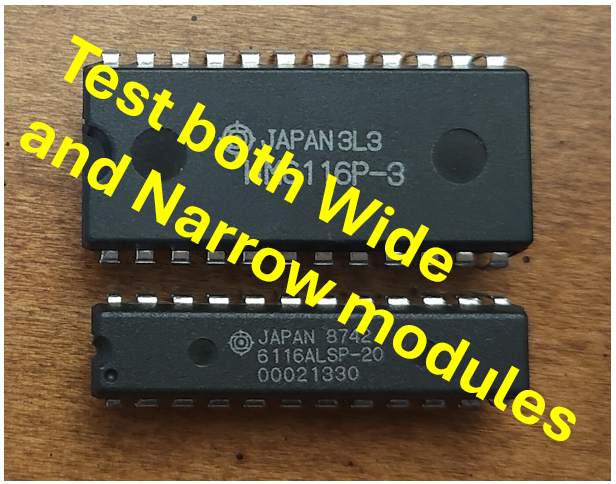
1. Insert one 6116 chip to be tested. Do not install 2 chips at once. Note - the semi circle mark on the chip should be pointing towards the leds. (pin 1 in the upper left)
2. Plug the Arduino in with a 9v power supply or USB. The test cycle will begin automatically.
3. The test will take a few minutes to completed and should end with Green = Good, Red = Bad
4. Press reset to restart a test.
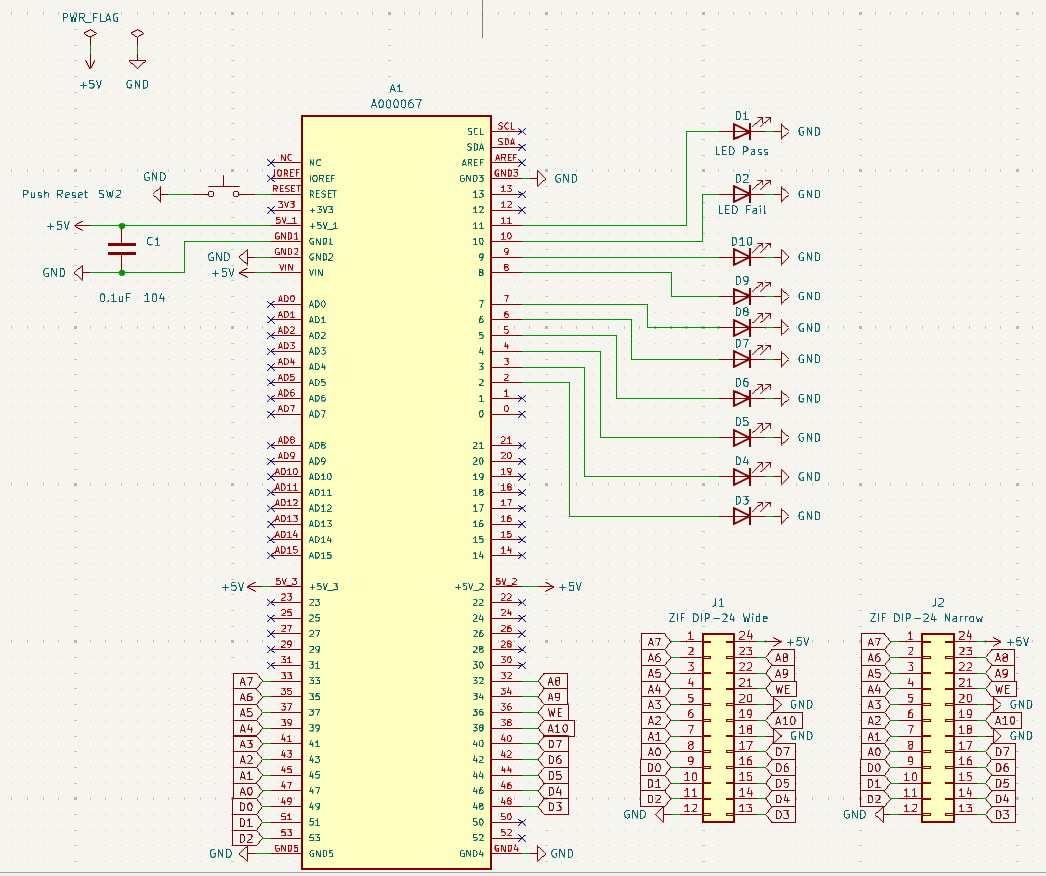
Schematic
Materials List
| Item | Reference | Qty |
| PCB | A1 | 1 |
| Capacitor 0.1uF 104 | C1 | 1 |
| 5mm green led | D1 | 1 |
| 5mm red LED | D2 | 1 |
| 5mm Blue LED | D3 - D10 | 8 |
| ZIF DIP-24 Wide | J1 | 1 |
| ZIF DIP-24 Narrow | J2 | 1 |
| Button Switch | SW2 | 1 |
| Pin Strip | 3 |
Kits and source code available here
https://github.com/cpyne2/6116-Memory-Tester
https://bsgelectronics.com/6116-ram-tester-arduino-mega
https://www.ebay.com/itm/166983829839